Selecting and Fitting Ski Boots

Peter Kunstadt |

In this paper, we will attempt to provide a brief history of the evolution of the sport of skiing and with it, the evolution of the ski boot. We will touch on the design and construction of the modern ski boot. We will describe briefly the process of selecting boots and matching the individual skier with the appropriate ski boot. And finally, we will discuss the process of boot sizing, fitting and adjustment.

DOWNLOAD A PDF OF THIS PUBLICATION HERE

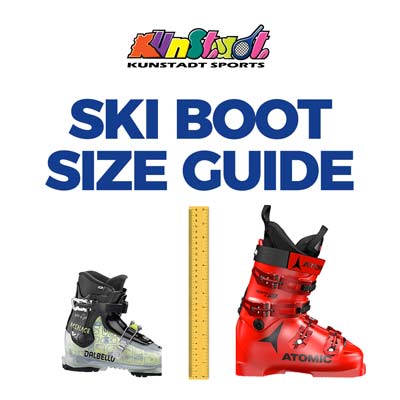
SKI BOOT SIZING CONVERSION CHART

Ski Boot Sizing Chart

Men's Shoe Size Mondopoint Europe U.K. Women's
8 (Child) 15 25 7 -----
(Child) 16 26 8 -----
10 (Child) 17 27 9 -----
11 (Child) 17.5 28 10 -----
12 (Child) 18.5 29 11 -----
13 (Child) 19.5 30.5 12 -----
13.5 (Child) 20 31 13 -----
1 20.5 32 13.5 -----
2 21 33 1 -----
3 21.5 34 2 -----
4 22 35 3 5
4.5 22.5 36 3.5 5.5
5 23 36.5 4 6
5.5 23.5 37 4.5 6.5
6 24 38 5 7
6.5 24.5 38.5 5.5 7.5
7 25 39 6 8
7.5 25.5 40 6.5 8.5
8 26 40.5 7 9
8.5 26.5 41 7.5 9.5
9 27 42 8 10
9.5 27.5 42.5 8.5 10.5
10 28 43 9 11
10.5 28.5 44 9.5 11.5
11 29 44.5 10 12
11.5 29.5 45 10.5 -----
12 30 45.5 11 -----
12.5 30.5 46 11.5 -----
13 31 47 12 -----
13.5 31.5 47.5 12.5 -----
14 32 48 13 -----
14.5 32.5 48.5 13.5 -----
15 33 49 14 -----
15.5 33.5 50 14.5 -----
16 34 51 15 -----


Evolution of Ski Boots

The sport of skiing dates back over a century. And so does the ski foot wear. Our forefathers did not call them “boots” Even this writer is old enough to remember having called them “ski shoes”. Indeed, the lace-up boots of the past resembled shoes a lot more than boots. To speed-up the lacing up process, these boots were often equipped with a series of hooks to replace the eyelets. They worked great, except with time, they would bend or rather straighten up and, as a result, the boot needed emergency professional attention.  

The introduction of mechanical buckles in late 1950s – early 1960s, represented a quantum leap in the development of boot technology. At this point, ski boots were still made of leather and their softness and low height was quite remarkable. We fondly (or even not so fondly) remember the days of frequent ankle fractures and other lower leg injuries. With the evolution of fixed bindings and later, safety bindings, the design of ski boots had to follow suit. Slowly, we learned about the advantages of a stiffer boot as a means of improving the vitally important interaction between the skier’s foot and the ski. At the same time, revolutionary plastic materials were being introduced ant the leather ski boot started to slowly disappear.


Early Plastic Boots

Plastic boots manufactured by Lange were the predecessor of today’s performance racing boots. Though they were remarkably low according to today’s standards and therefore still dangerous to the skier’s ankles, their stiffness provided unprecedented performance improvement. Slowly, boots’ cuffs were growing taller and the boots started to resemble today’s modern ones. Scott introduced their extremely compact and light single buckle boot which immediately became a hit, mostly with freestyle skiers. Another boot style that enjoyed popularity for a limited period of time, was the rear entry boot. The undisputable advantage of the rear entry boot was the comfort and the ease of foot entry. On the other hand, the comfort these boots offered did not compensate for the significant absence of performance. Today, the only rear entry boots on the market are those made for little children where performance is not an issue.

Modern Ski Boot Construction

Understanding the composition of a ski boot will allow the user to make an educated purchase decision and improve his/her ability to use the ski equipment effectively. The ski boot is the integral link between the ski and the skier. The movement and energy the skier’s body initiates is translated to the ski through the boot. Each component of a ski boot plays a specific role in both fit and performance.

  • Buckles

    The buckles are what latches the ski boot closed. While there are many styles of buckles, the key components are the “ladder”, the bail, and the buckle itself. The ladder is the graduated rung that the bail or wire, hooks onto so that the buckle can close to latch the boot tightly around the foot and/or ankle. Ski boots may have as many as four buckles, each drawing the boot tightly around a different segment of the foot or ankle.

  • Flex Adjustment

    The flex of a boot is determined by the shin’s ability to move forward against the resistance of the upper cuff. A stiffer boot will increase performance but is usually less comfortable. A softer, more flexible boot will absorb more impact from the terrain but at the cost of performance. The flex adjustment allows the skier to fine-tune the stiffness of the boot to balance comfort and performance.

  • Forward Lean Adjustment

    The forward lean of a boot is the amount the boot forces the ankle to bend when standing in it. Boots equipped with a forward lean adjustment can be fine-tuned to a specific neutral athletic stance, where the knees and ankles are bent and the weight is primarily on the balls of the feet but evenly balanced from side to side.

  • Footbed

    The footbed of a ski boot provides the support for the sole of the foot. The greater the surface area of the foot making contact with the footbed, the better the control and performance of the boot. For this reason, many skiers turn to custom-moldable footbeds that match the contours of the foot perfectly.

  • Boot Liner

    The liner provides both comfort and protection while increasing the performance of the ski. The padding of the liner cushions the foot and ankle, protects it from friction, impact and cold as well as creating full foot contact, which forms the foundation for energy to transfer from the body to the ski. Ski performance is directly related to how well the foot contacts the liner of the boot and how well the liner integrates with the outer shell.

  • Lateral Upper-Cuff Adjustment

    The lateral upper-cuff adjustment is used to improve the lateral alignment of the leg in order to create a stable stance compensating for misalignment of the upper and lower leg.

  • Outer Shell

    Typically made of plastic or composite, the outer shell provides stability to the boot and is primarily responsible for the transfer of energy from the body to the ski. The rigidity of the boot also provides foot and ankle protection.

  • Power Strap

    The power strap is usually a Velcro at the top rim of the boot that secures the upper cuff comfortably around the calf. The ramp angle is the angle between the heel and the ball of the foot in relation to the ski. This angle is created primarily by the boot and on some boots may be adjusted to shift your center of mass either forward or backward in order to maintain a neutral athletic stance with the weight balanced on the balls of the feet while still allowing for the use of the entire foot to apply pressure to the ski.

  • Ski/Walk Feature

    A ski/walk feature is usually included on recreational ski boot models. It is a hinge on the boot cuff that opens the upper cuff, reducing the forward lean allowing for more comfort off the slopes without compromising on the slope performance. This feature is usually not appreciated by advanced skiers who understand that ski boots are generally not made for walking.

  • Upper Cuff

    The upper cuff of a ski boot is the portion that wraps around the calf, upper ankle and shin. It is typically connected to the lower boot by a hinge and is responsible for the overall stiffness, lateral stability and forward lean of the boot.

Ski Boot vs. Skier Type

Conventional front entry ski boots are designed to satisfy the needs of a wide variety of end users.

  1. Racing Boots

    Racing boots as a rule, provide the maximum performance in terms of energy transfer to the ski and minimum comfort. Usually, racing boots have the minimum of fancy features, just a stiff shell, rudimentary buckles and a thin liner to bring the racer’s foot as close as possible to the shell of the boot for a perfect transfer of energy to the ski.

  2. Free Style Boots

    As the name suggests, these boots are primarily suitable for free-style skiing. They are lighter and somewhat softer. They perform well in moguls and ski & board parks. However, they are often successfully used in general all- mountain applications. Boots in this category generally satisfy the needs of the majority of skiers. They are built with the intention of finding the optimum balance between the performance that is expected of them and the comfort of the skier. They vary widely in terms of stiffness and various features designed to please the end user.

  3. Cabriolet Ski Boots

    These boots are basically a variation of all mountain boots. They have a unique tongue design and a separated front part of the shell. This concept provides extreme ease of entry and improved comfort. Even with softer models, there is limited shell distortion when flexing. In addition to general all- mountain applications, this type of boots is also becoming popular with free style skiers.

Matching Boots to a Skier

A number of variables need to be considered when trying to make the optimum match between a skier and his/her new ski boots. The skier’s ability is perhaps the most important factor. Boots that are inappropriately stiff will unnecessarily inconvenience an intermediate or beginner skier and conversely, excessively comfortable and soft boots will prove to be disappointing to an advanced skier expecting a high level of performance. A similar consideration is to be given to the skier based on his/her size and strength. Obviously, a stronger or a heavier skier will require more substantial ski boots than a light-weight. When choosing ski footwear, an important consideration is the number of days per year and a number of hours per day that the skier is expected to be on snow. Consider the difference between a Ski Patroller or a Ski Instructor and an occasional skier that gets out a few times per year for just a few hours at a time. Obviously, the latter group will not require the sophistication and quality that is imperative for the first group. Flex selection is the matter of a personal choice between higher performance versus higher level of comfort.

High vs. Low Flex

  1. High Flex (Stiff) Boots

    These boots are generally characterized as follows:

  • Reduced range of motion
  • Every input immediately transferred to the ski
  • Less forgiving
  • Low impact absorption
  • Thin liners
  • Low comfort level

It should be noted that all the above characteristics add up to superior performance and high level of satisfaction with advanced high performance skiers and racers.

  1. Low Flex (Soft) Boots

    In contrast to stiff high performance ski boots, these introduce:

  • High comfort level
  • Longer response time
  • Excessive movement requirement
  • High energy outlay by the skier

These boots will be suitable for intermediate or beginner skiers who value comfort above performance. They will also suit skiers who plan to spend a very limited time on the slopes.

Boot Fitting – General

When trying to select the appropriate ski boot for a particular skier it would be prudent to follow a few rudimentary steps in order to avoid bitter disappointment:

  • Try boots with the socks you will be skiing in.
  • Use socks specifically designated for skiing.
  • Use a foot measuring device first.
  • Select no more than three boots to start, preferably made by different manufacturers.
  • Remember to select boots that match your abilities, don’t choose boots that would suit your World Cup hero as he/she most certainly has completely different needs and preferences than yourself.

Boot Shell Fitting

The purpose of boot shell fitting is to establish the amount of space left in the boot between the shell and the foot, to be filled by the liner. Different skier types require different tightness and therefore a different shell fit. The shell fit is performed by placing the foot in the shell and moving it to the extreme front of the boot. The type of fit is determined by the amount of space between the heel and the back of the boot shell. In general, the categories are as follows:

  • 1⁄4” – Race Fit
  • 1⁄2” – Performance Fit
  • 3⁄4” - Comfort Fit
  • 1” & over – The boot is too large!

It is highly recommended to choose the smallest shell that fits. The most common error in boot fitting is the choice of boots that are too large.


Boot Fitting

The final procedure in boot fitting is the actual fitting of a boot complete with a liner. This is the ultimate test that should give the user a clear impression of how the boot will perform on snow and what level of comfort it will provide. It must be born in mind that, when trying on new boots, there is a lot of “unadjusted” foam in the liner which will form itself around the user’s anatomy with time. This is why a cardinal rule is that a new boot in a store must feel excessively tight, though not painful. As a rule, the steps that are followed are:

  • Slide foot in the boot
  • Buckle up starting with 2nd buckle from the top
  • Tighten power strap
  • Gently flex forward emulation skiing motion
  • Toes must be touching the shell slightly, not hurting.

The reason for starting the buckling-up procedure with the second buckle from the top is to force the foot into the liner’s heel pocket to assure proper foot position in the boot lengthwise.

Vacuum Ski Boot Technology

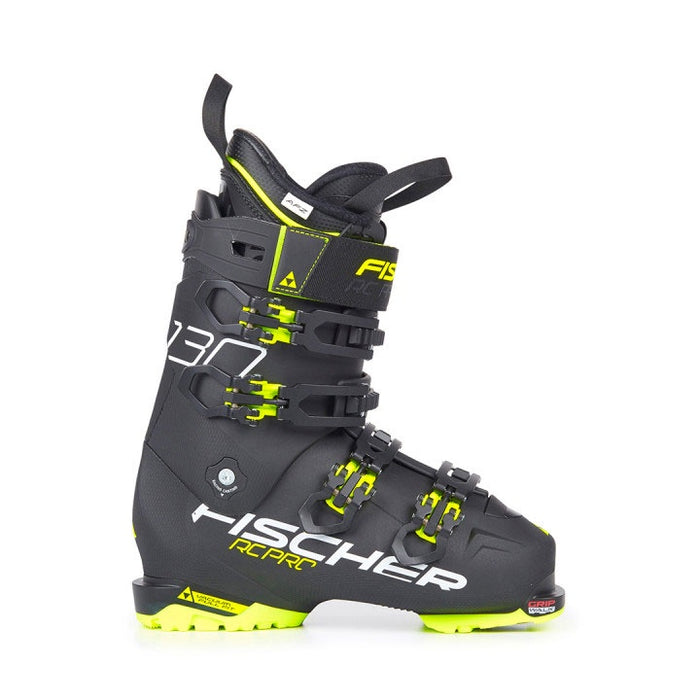
Researchers and engineers at Fischer, after years of research, developed a new plastic which wasn't as temperature sensitive as those used in ski boots up to the year 2010. What they discovered in the process was a plastic that also was heat moldable, and this innovative new material has made a revolutionary new boot from Fischer possible. The Vacuum boot, available since the 2011 season, is named for the process in which the boot is conformed to the skier's foot so that every irregularity is accommodated by the molding process, and the result is a perfectly comfortably fitting boot. The process begins with putting the skier's foot beds, if desired, in the liner, as this will change how the skier's foot sits in the boot. Then the skier puts the liners back and puts the boots on with his or her usual socks. Then he or she steps into a set of bindings mounted to a custom machine specially built by Fischer. The technician sets the stance width for the bindings to the skier's hip width so later, when the skier is back on skis, he or she will be standing on a perfectly flat ski when straight running. The skier gets off the machine, out of the boots, the liner is removed, and the shells are heated for 10 minutes at 175 degrees Fahrenheit in a custom oven. While the boots are in the oven, the binding plates are taken off the machine and a horizontal bar that is vertically adjustable is installed. This sets the forward lean between 14 and 17 degrees, based on skier preference and skiing ability. Once the boots come out of the oven, the liners go back into the boots and the skier puts them on, buckled to the loosest setting. Then a refrigerated pack is wrapped over the boot, followed by a compression pack that fully encloses the boot. The skier then steps back on the machine and leans against the bar that sets the forward lean of the boots while they are still soft. An air hose is attached to each boot to pump up the compression packs. It is generally believed in the industry that this new technology is going to revolutionize ski boot fitting. It offers comfort and performance to all skiers, male and female, including those with hard-to-fit feet.

Upgrading your Foot Bed

A surprisingly high number of otherwise high quality ski boots are equipped with mediocre or sub-standard foot beds. Perhaps it is expected that experienced skiers use their own upgraded or custom-fitted footbeds. There is a great variety of after-market foot beds available ranging from simple generic footbeds right up to expensive personal custom-made foot beds.

Minor Boot Adjustments

  1. Punching and Grinding

    After using new boots for a period of time, it may be necessary to perform small adjustments to eliminate “sore points” that may develop and/or align boot cuffs etc. Small sore points can be eliminated by adjusting the boot to make room for the parts of anatomy that prove to be troublesome. This can be accomplished by localized heat stretching (punching) using specialized tools or alternatively, grinding the inside of the shell. It is highly recommended to ski enough prior to making these adjustments to make sure they are indeed necessary as they are irreversible in many cases.

  2. Cuff Alignment

    In order to adjust the boot cuff to align the upper and lower leg, most advanced ski boots have adjustable cams where the cuff is attached to the lower boot. It is highly recommended to use personal foot beds for this procedure if they are available.

Advanced Ski Boot Adjustments

Foot Bed

A fitted foot bed is the first step in advanced customization of a ski boot. We have briefly touched on the use of after market ready-to-use foot beds. However, for a real personalized fit, a personalized foot bed is highly recommended. The truth is, this is a “pricey” device, but the improvement in comfort and ski control makes it all worthwhile. Custom foot beds are often considered to be prescription orthotics, sometimes eligible for insurance coverage.

Shell Stretching, Grinding and “Punching”

Minor sore spots in boots are relatively easily taken care of local adjustment. A reputable ski boot shop will be able to make room for anatomical foot oddities by locally heating the area that causes discomfort and stretching the plastic accordingly. Alternatively, grinding off some material inside the shell will achieve a similar effect. Almost every fitting problem can be fixed. However, a “sloppy fit” of an excessively large boot can rarely be made right.

Alignment and Canting

Sophisticated devices are used to detect a skier’s knee alignment. Individual deviations vary from “bow-legged” to “knock-kneed” stance. The goal is to get the boot to be perfectly flat when the skier is standing in a neutral position. Once the amount and direction of the deviation is established, it is time to plane the soles. This is the most complex procedure of all boot fitting and it is also irreversible, so choose your boot technician carefully to avoid ruining a pair of boots. The planing operation removes material from the sole and replacement soles need to be installed on completion of the planing. The last operation in this complex procedure is to mill the front and rear lugs of the boot back down to DIN standard dimensions to assure correct interaction between the boot and the binding. Canting is not for everyone, but those high performance skiers who tried it, will never ski in boots that weren’t finely adjusted to perfectly match their anatomy.

Guaranteed Fit

A reputable ski or boot shop will usually guarantee that the end user is matched with the appropriate boot type that fits correctly. The way it generally works is simple. If you pay attention to the boot fitter’s recommendations, your fit should be guaranteed. If however, you fail to follow these recommendations, you may find yourself “on your own”, so to speak.